Setup guide
Everything you need after delivery: take ownership of your bot, host it, invite it to your server and keep it running.
1What you got
After the final payment you receive two things:
- A ZIP file with your bot. The complete source code, already configured and ready to upload to a host.
- An invite to take ownership of your bot's Discord app. Step 2 shows how the transfer works.
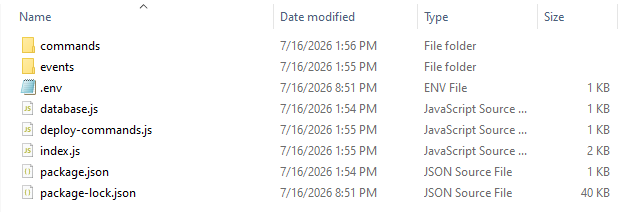
Your bot's token is stored in the .env file inside the ZIP. Treat it like a password: don't share the ZIP and never post the .env file anywhere.
2Take ownership of your bot
I create and configure your bot's Discord application. Discord moves an app to another account through a Developer Team, which requires two-factor authentication. The transfer works like this:
-
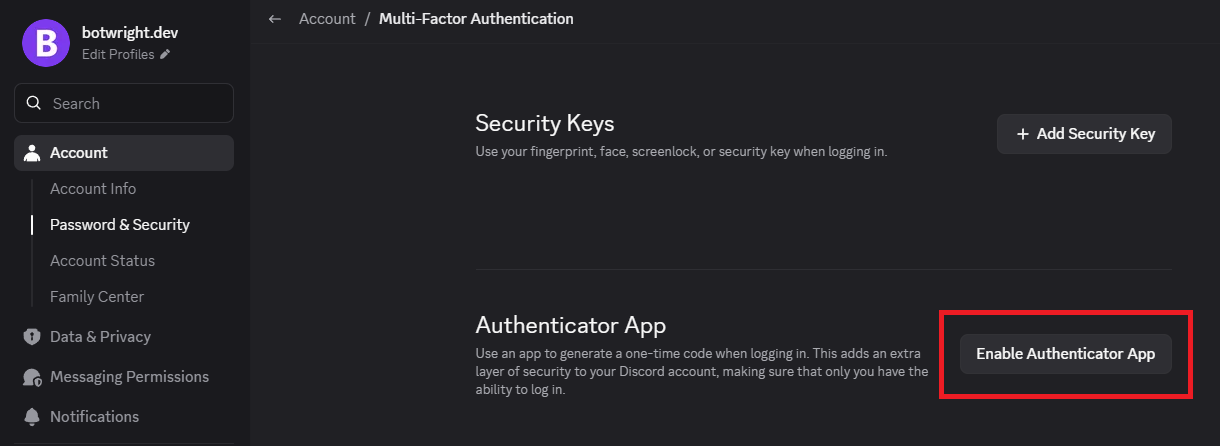
Enable two-factor authentication. In Discord, open User Settings → Account → Password & Security → Multi-Factor Authentication and click Enable Authenticator App.
-
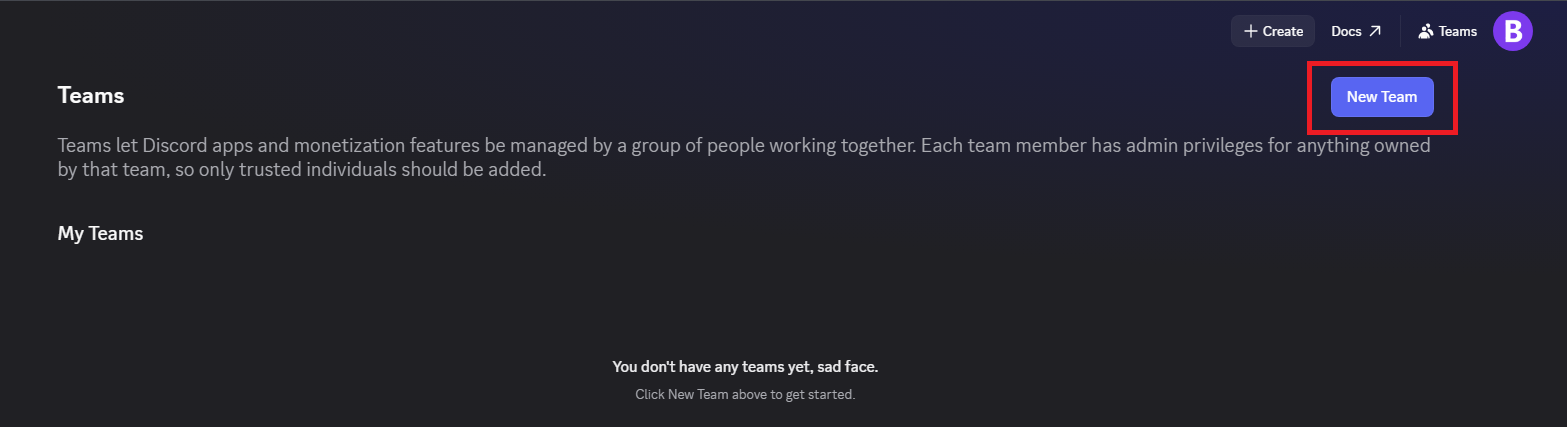
Create a Developer Team. Open the Discord Developer Portal → Teams and create a new team. Any name works.
-
Invite me to the team. Open your team, invite a new member and enter my Discord username
ondra399. Give me the Admin role so I can transfer the app.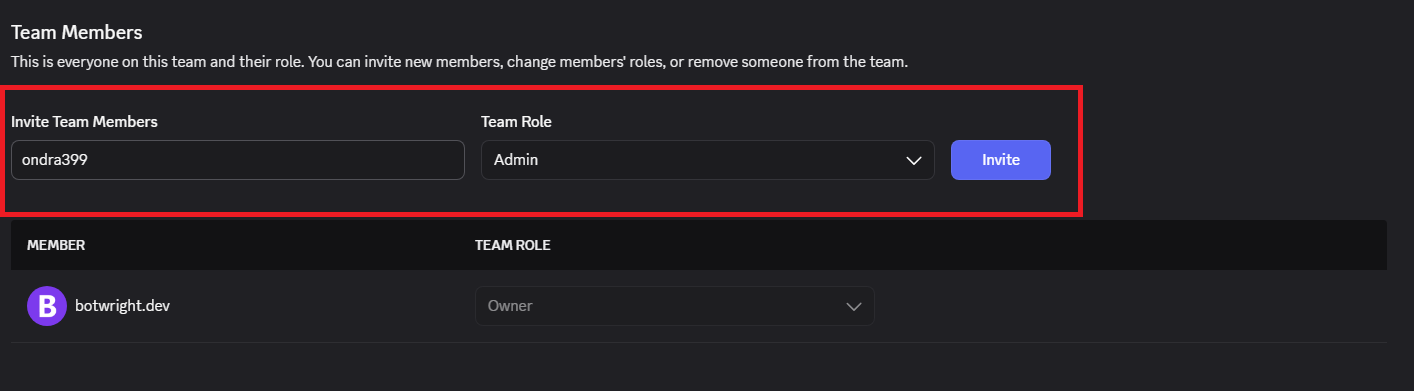
-
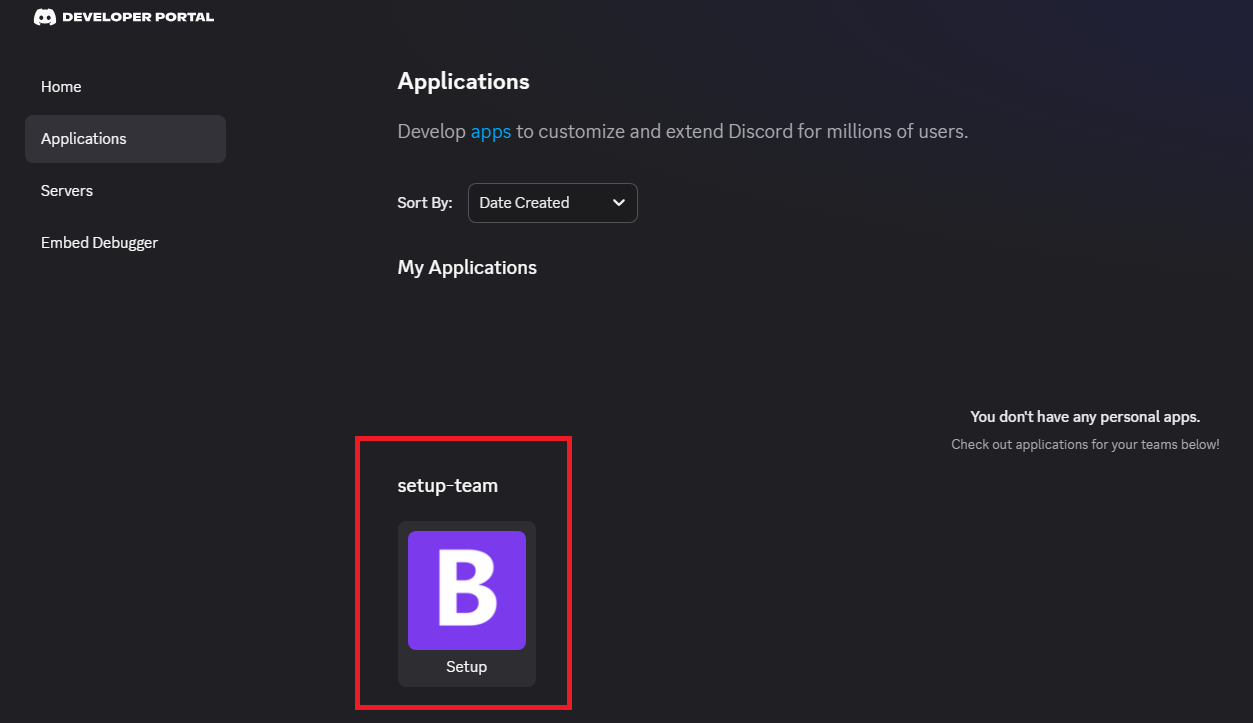
I transfer the app. I accept the invite and move your bot's application into your team. You'll then see it in the Developer Portal under your team.
-
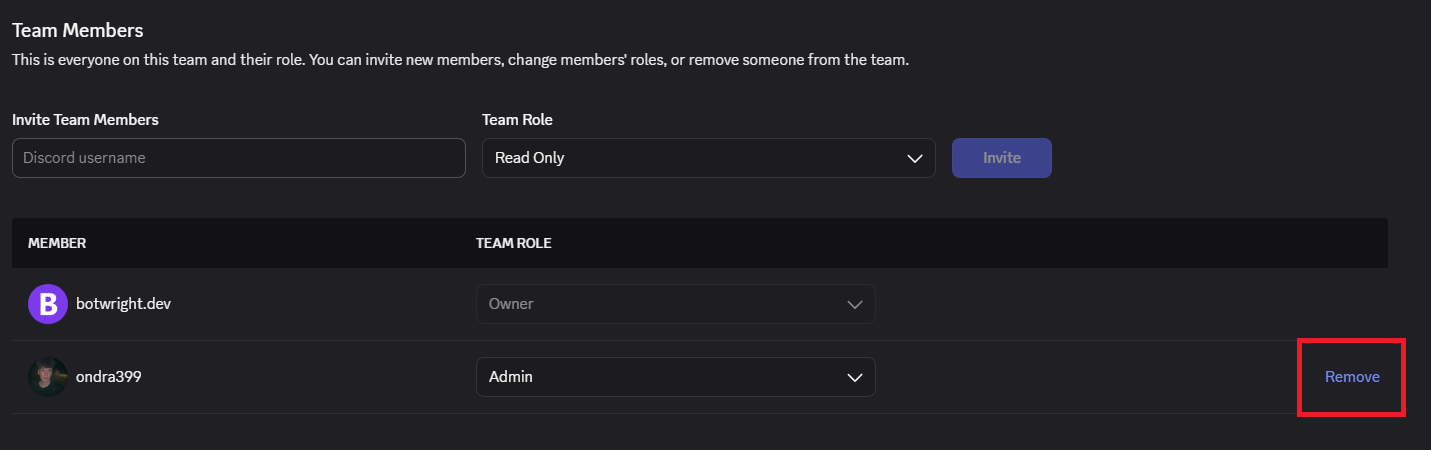
Remove me from the team. In your team's member list, remove me. From now on only you control the bot's application.
3Host your bot on bot-hosting.net Recommended
Your bot needs a server that keeps it online around the clock. I recommend bot-hosting.net because it's easy to set up and has a free plan. This is only a recommendation: any host that runs Node.js works.
-
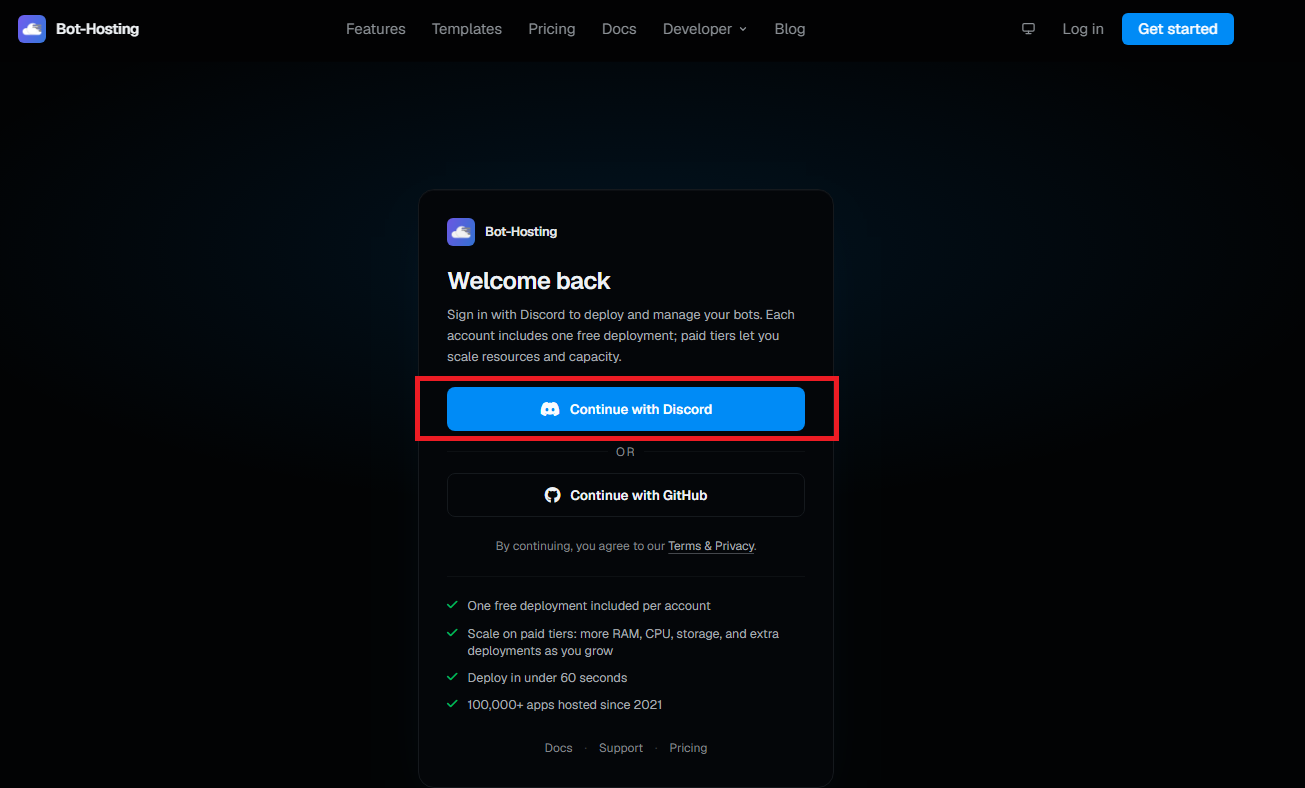
Sign in on bot-hosting.net with your Discord account.
-
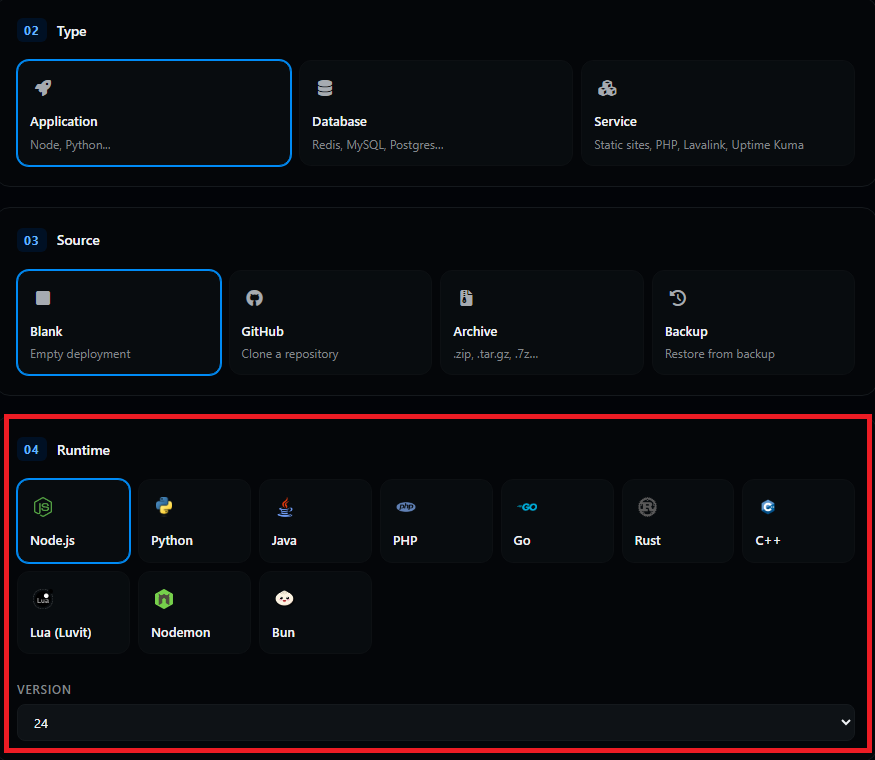
Create a new deployment: Type Application, Source Blank, Runtime Node.js, version 24 or newer.
-
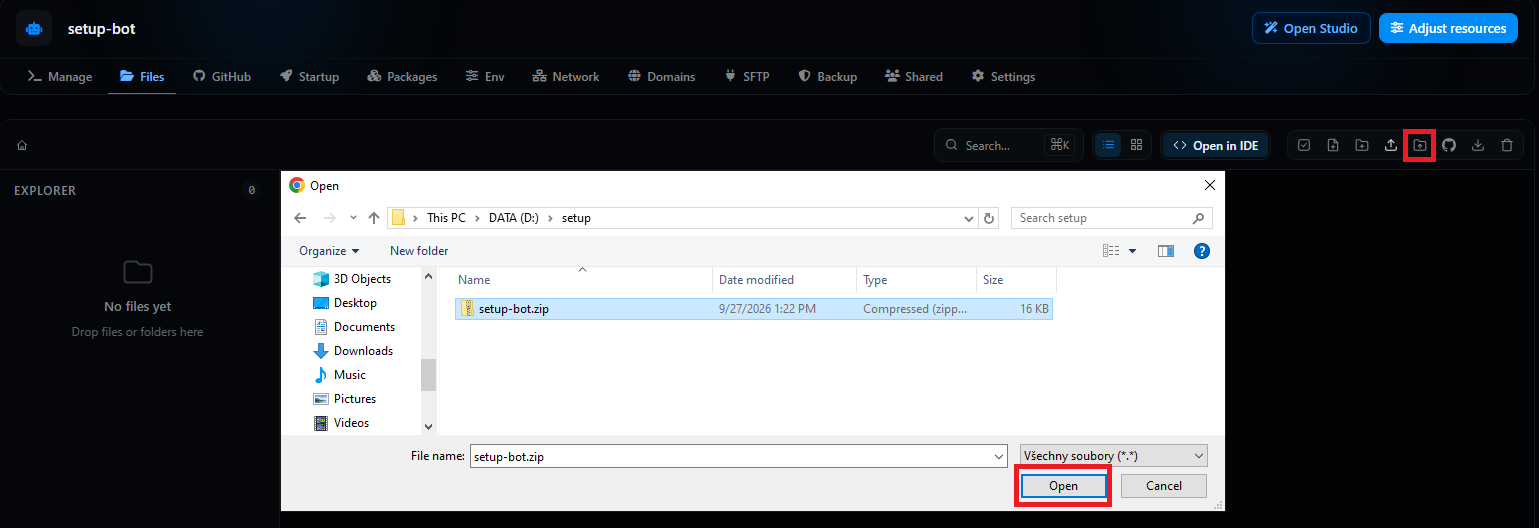
Upload the ZIP. Open Files and upload the ZIP, either with the upload button or by dragging it into the file list.
-
Unzip it. Right-click the ZIP and choose Decompress.
index.jsandpackage.jsonmust end up in the main folder. You can delete the ZIP afterwards.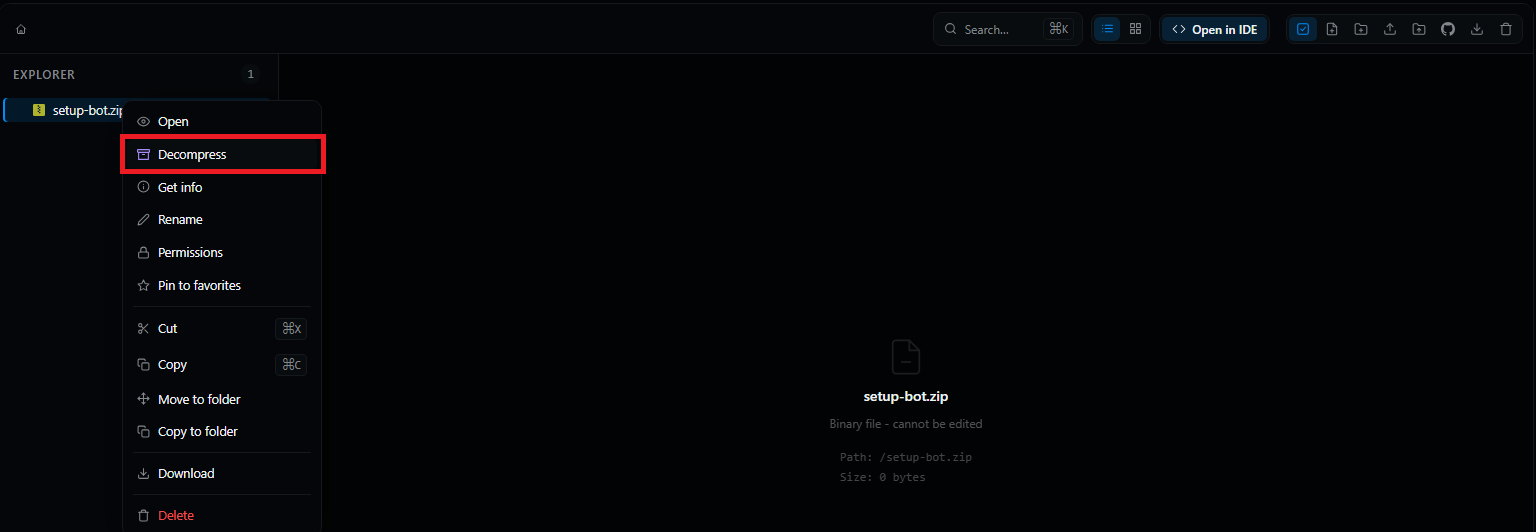
-
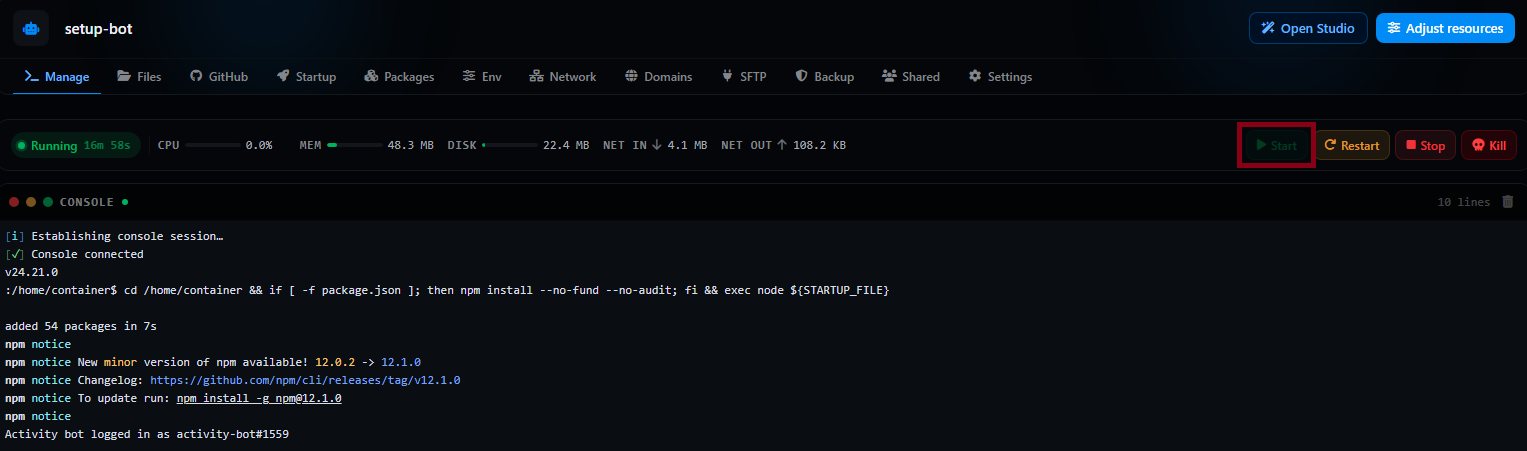
Start the bot. Open the console and press Start. The first start installs everything the bot needs automatically, this takes a few seconds. After a moment your bot shows as online in Discord.
Free plan: it must be renewed every 4 days, otherwise the bot stops. Paid plans run without renewal.
4Invite the bot to your server
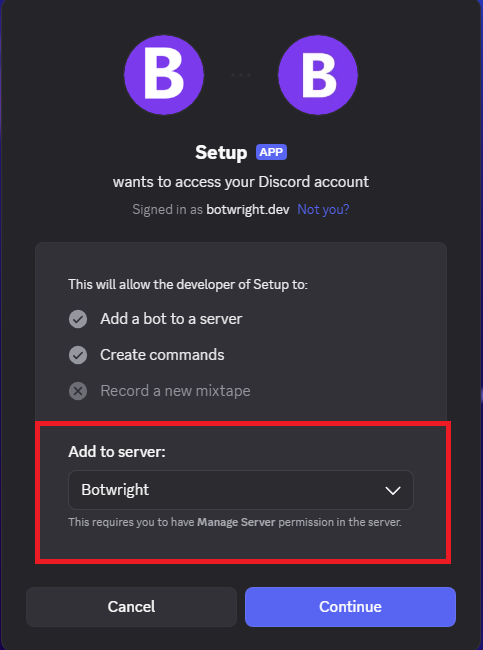
Open the invite link I send you with the delivery, pick your server and confirm. You need the Manage Server permission on that server to add a bot.
5Optional: reset your token
After the transfer you can reset the bot token at any time, so that only you know it:
-
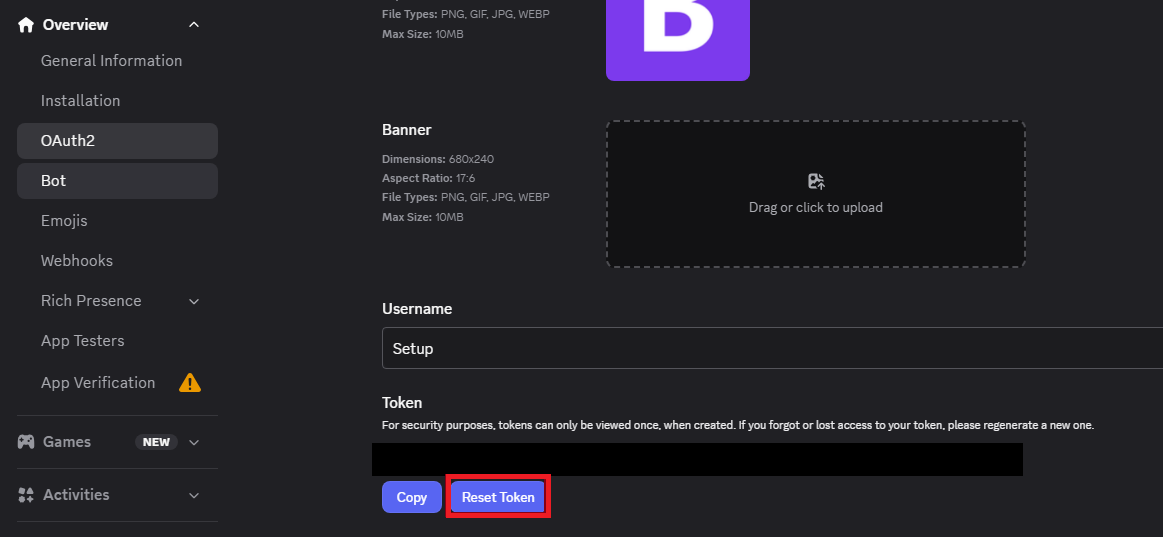
Reset the token. In the Developer Portal, open your bot's application → Bot → Reset Token, and copy the new token.
-
Update the
.envfile. In Files, open the.envfile, replace the old token with the new one and save.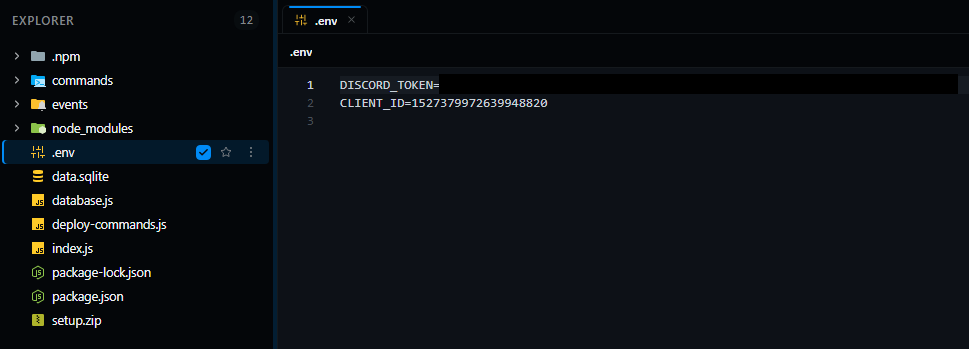
-
Restart the bot in the console.
The old token stops working right away, so the bot stays offline until the new token is in the .env file.
6Troubleshooting
Most problems have a simple cause:
The bot is offline
On the free plan, check that the server was renewed in time (every 4 days). Otherwise the bot was probably not started: open the console and press Start.
Slash commands don't show up
After the first start it can take up to an hour before Discord shows the bot's commands. Give it some time.
"Missing Permissions" errors
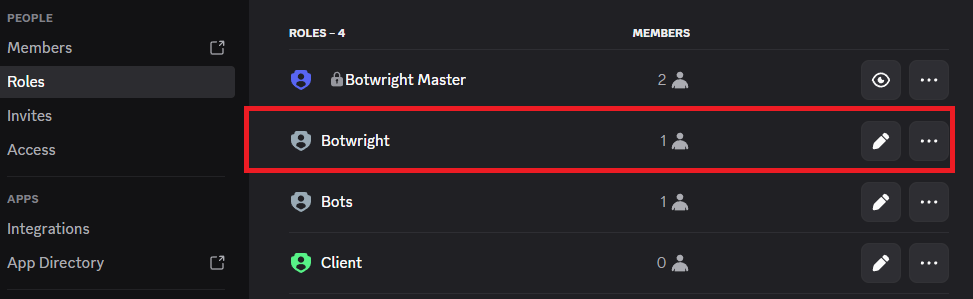
The bot's role needs access to the channel or category it works in, and it must be above the roles it manages. In Server Settings → Roles, drag the bot's role higher.
"Invalid token" error
The token was reset. Copy the current token from the Developer Portal into the .env file and restart the bot (see step 5).
7Need help?
Within 14 days of delivery, bug fixes are free. Open a ticket on the Discord server and describe what's wrong. After that, support is paid and quoted per request.